
How to replace an Oxygen Sensor in an ISC M40


Step 1: - Open up the ISC M40
The ISC M40, uses high quality, machine thread screws for the cover. Once you have removed all of the screws, use caution while opening up the unit. There is a power wire connected to the vibrating alarm and and can easily be damaged if proper precautions aren't taken.


Step 2: - Remove vibrating alarm and back cover
Let's go ahead and remove the power wire. Do this by either using tweezers or a PC Jumper Removal Tool. You can use your fingers and kind of wiggle it out but that is not recommended, as it could jeopardize the integrity of the wires. Once you have the power wire off remove the gasket. Again, proper precaution should be taken at every step.


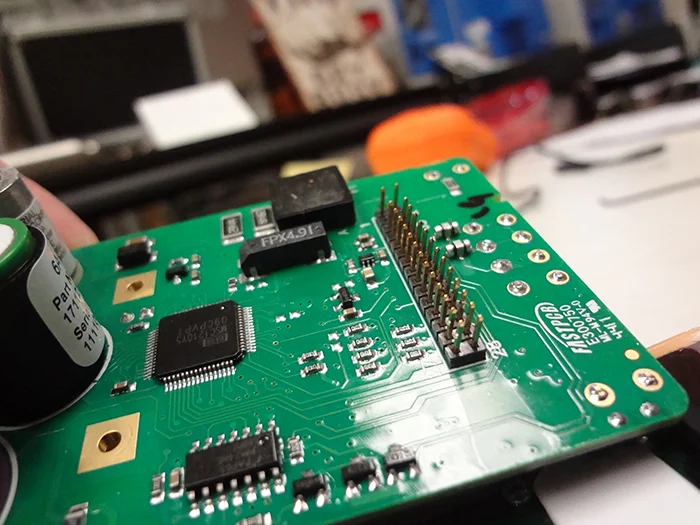
Step 3: - Remove the sensor board
There are 4 screws and Socket, (similar to a IDE HDD connector) holding this board is place, this step can easily go very bad very quickly. Well start by loosening the 2 bottom screws where the plastic piece is, I loosen them up about 3/4 of the way. Next we remove the 2 on the circuit board. Once you have loosened and removed the screws there is still the socket and pins attached to the board. From the top gently pull the boards apart DO NOT force this. This requires some finesse, examine the images below to get a better understanding of why you need to be so gentle.


Step 4: - Remove the bad sensor
First we need to identify the oxygen sensor. We can clearly see which one that is. Right? Pull straight sometimes a little wiggle is required but generally they come right out of the socket. This is a good time to record the sensor serial number and date code, this should also be done with the new sensor that is going to be installed. Oxygen sensors last about 2 years, After that we highly recommend replace them. A persons life is not worth the price of a sensor!


Step 5: - Installing the new oxygen sensor
Line up the pins and it should almost drop into place. Apply a small amount of pressure and ensure that sensor is properly seated.


Step 6: - Re-attach the sensor board
Set the sensor board in the plastic hinge and slowly insert the pins into the socket. DO NOT force it! If you force this step it can permanently damage your sensor board. Go slow and pay close attention to how the board feels goin the socket, if its lined up correctly you will not have any issues. Pulling the sensor board out improperly or if you try to force it in, will most likely bend the pins and will make finishing this process even more difficult. The trick to installing the sensor board is to gently set in the plastic piece on the bottom of the unit, then hinge board so that pins gently slide into the socket.


Step 6: - Re-assembly
Once you have successfully re-attached the sensor board, tighten the 4 screws up and reinstall the gasket. Reinstall the vibrating alarm. close it up and reinstall the case screws.


Step 7: - Wait and Zero
We typically wait 20-30 minutes to allow the oxygen sensor to acclimate to the ISC M40. Once the unit is stable and the oxygen reading isn't jumping around, we Zero the unit. Do this by pressing the up arrow key to the far right. Next a confirmation menu will show on the screen to perform a zero calibration press the enter key to confirm, the next step is calibration. You can find that guide here.

